Week 6: Programmer + Microcontroller
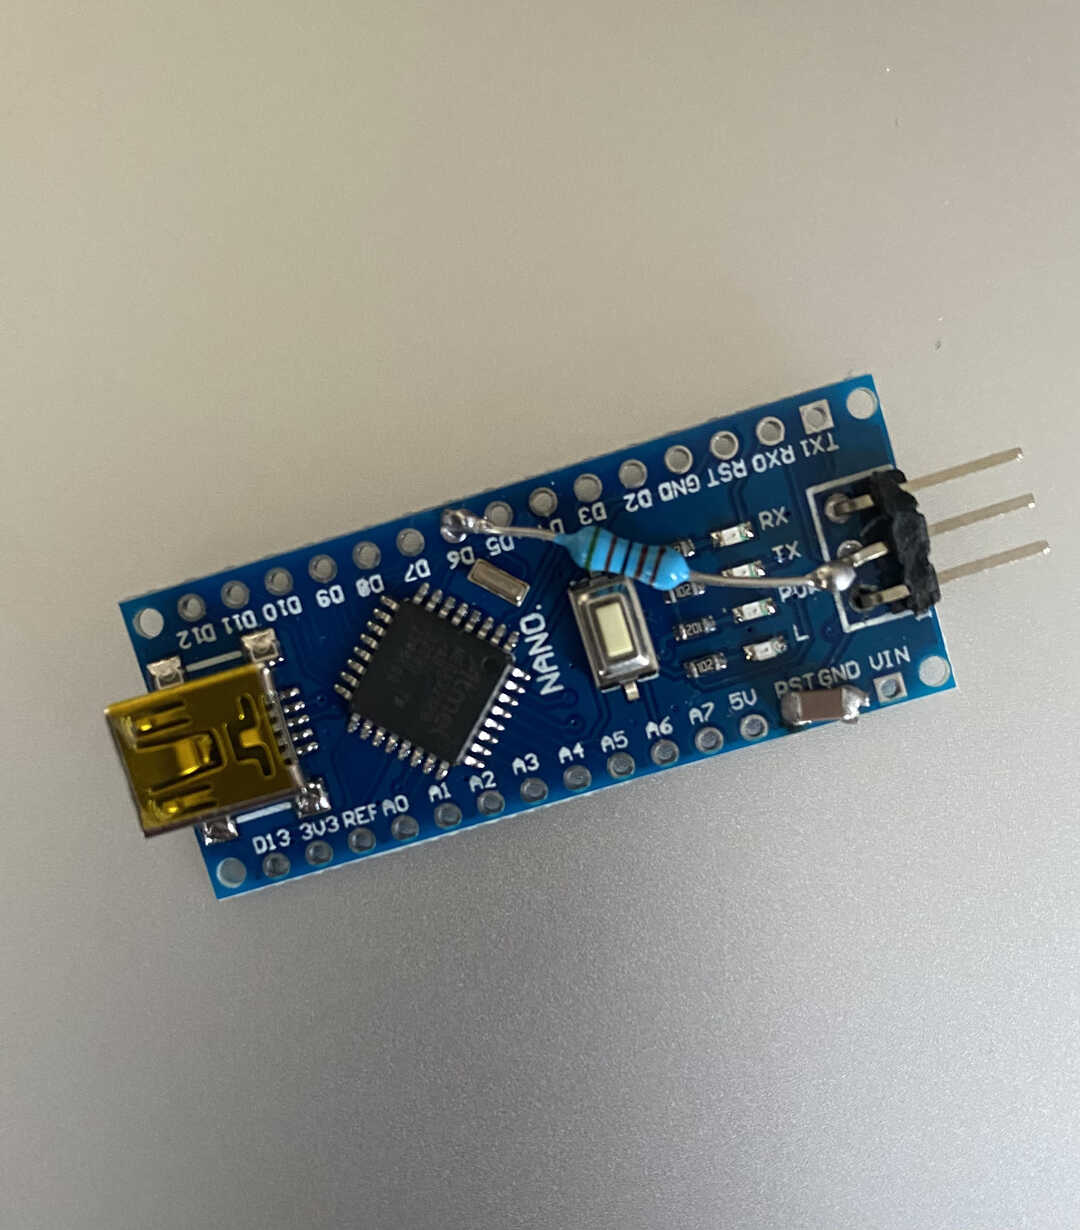
Heres how a summary of how I turned a Arduino Nano to a programmer.
For more details, read this website. I followed it as well when making this.
First, I bent the middle pin of a three pin right angle header and soldered the side pins to GND and 5V.
I could then solder a resistor between the middle pin header and pin 6.
After that I soldered a capictor to RST and GND
I then plugged it in to my computer and uploaded this code using Arduino IDE. This turned my Nano into a programmer.
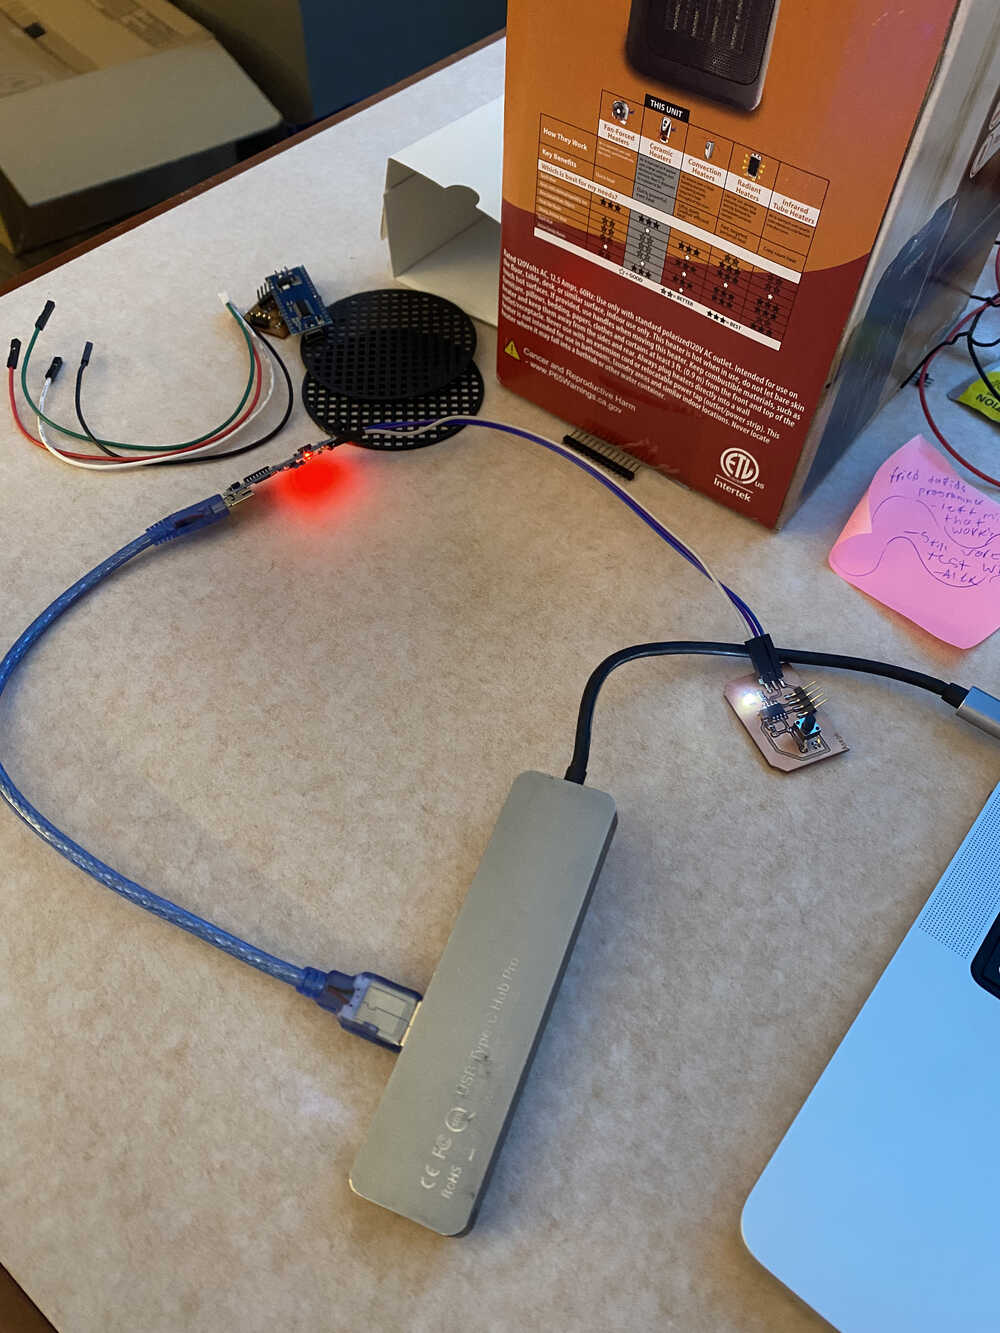
Here is the final product.
After I turned the Nano into a programmer, I went on to design the pcb
that was going to hold the ATTiny412 microcontroller.
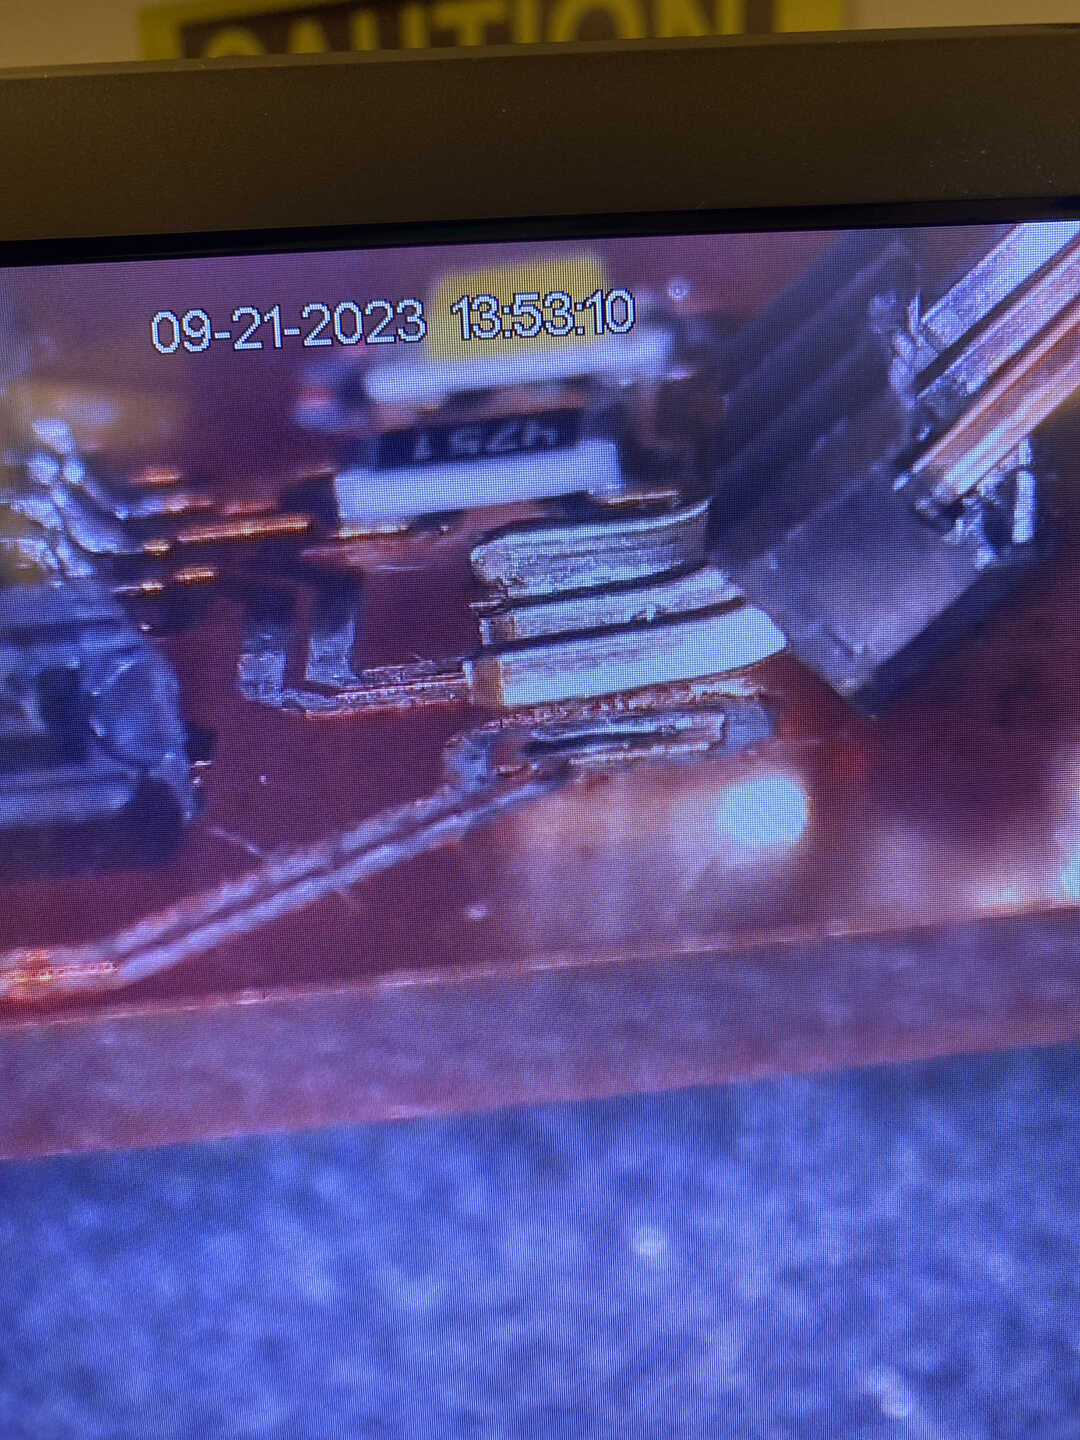
My first go at cutting out the copper I made a mistake in exporting the DXF.
The ground pins were seperated from the rest of the ground.
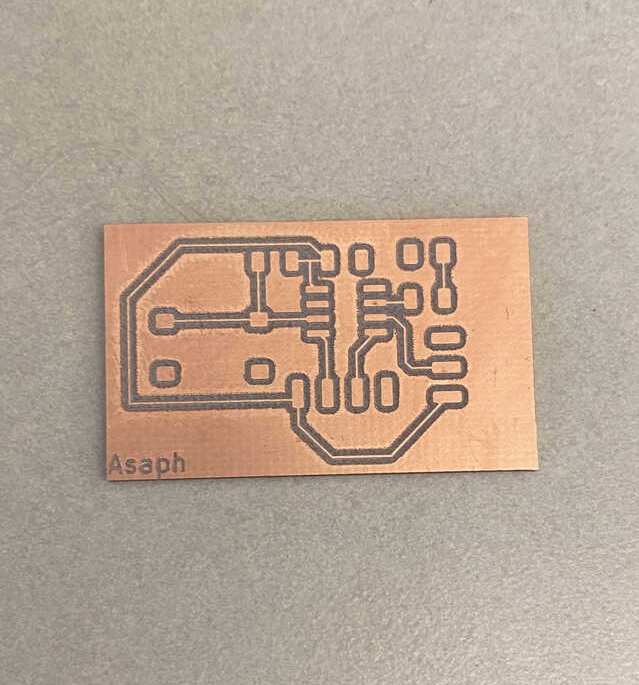
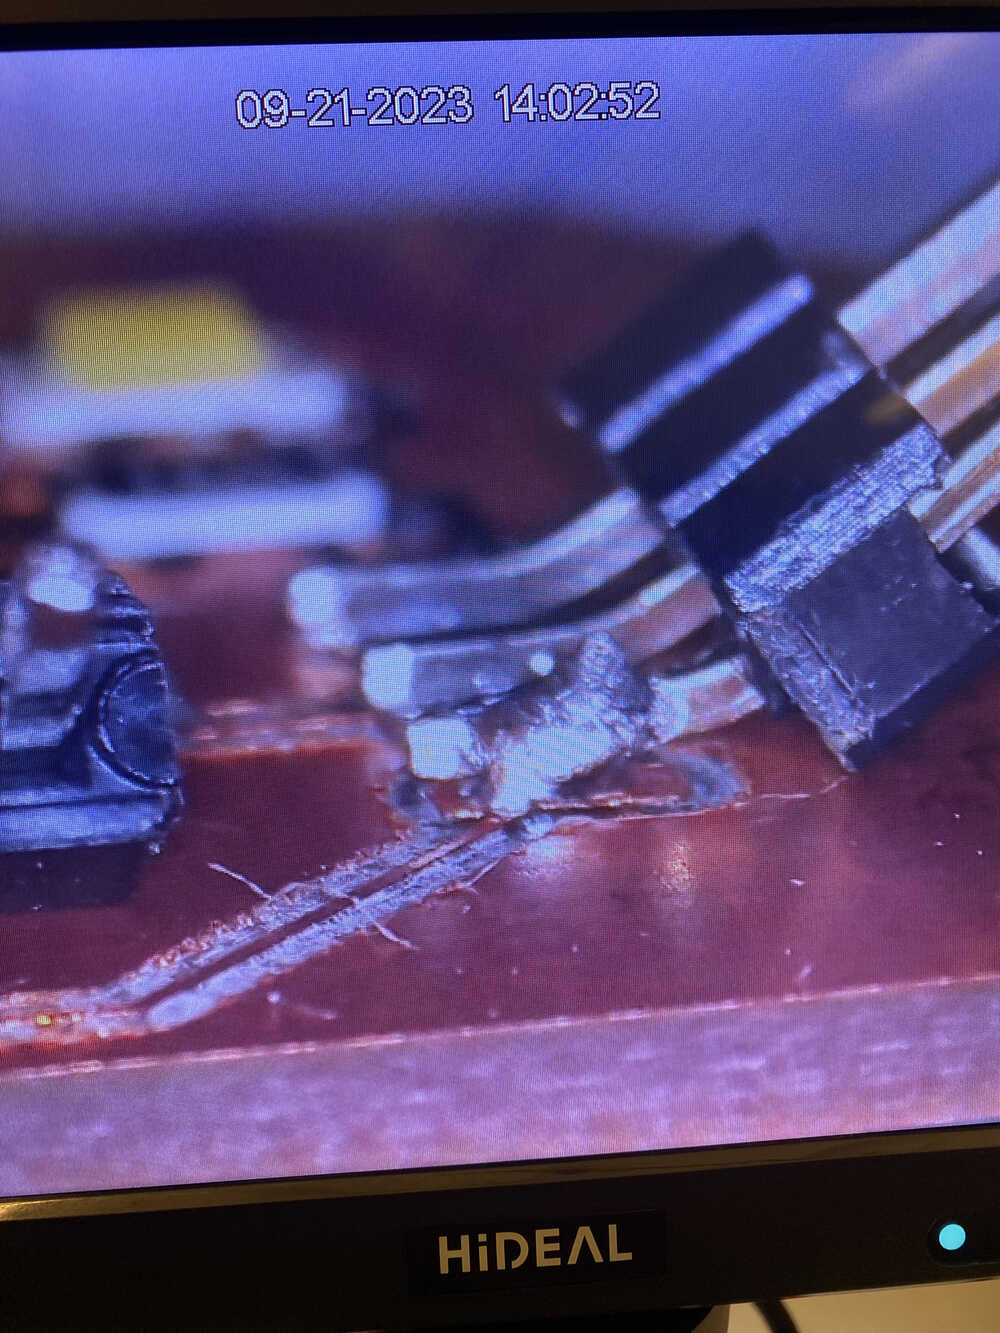
Fixed the issue by correctly exporting as DXF.
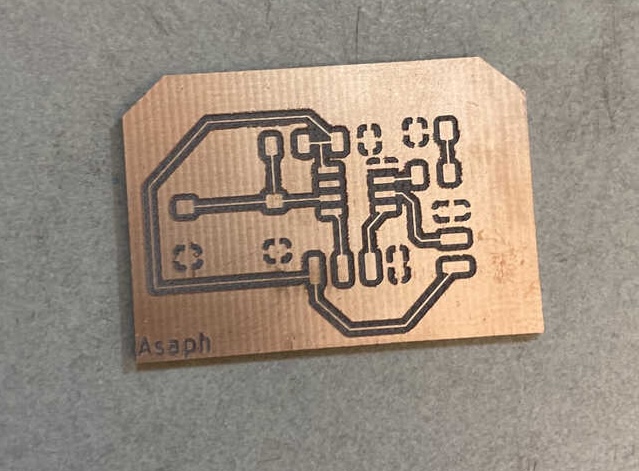
After that I checked the connections and everything was connected properly.
I didn't have to do anything to the board after it was cut.
I then spent a lot of time slowly putting on all the parts because this was my first
time putting this many parts on one pcb board.
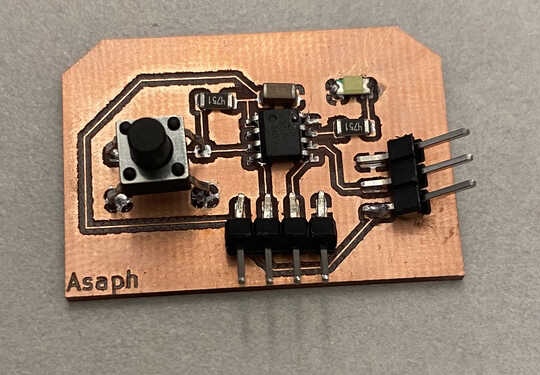
After this stressful process (for me), I put all the parts into the oven and waited...
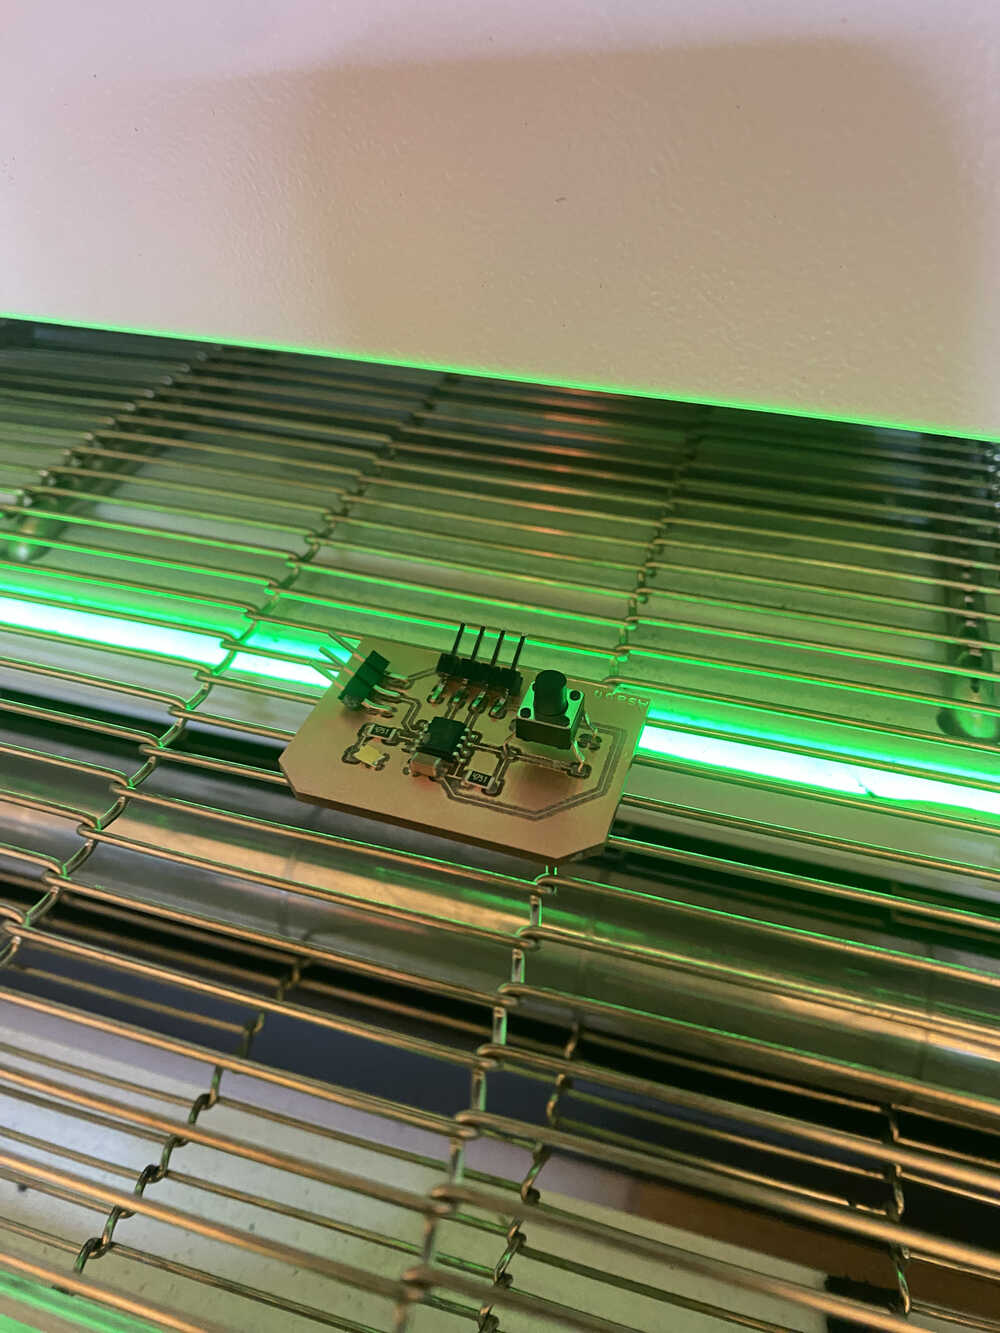
When the pcb came out, one pin on the three pin header wasn't connected fully to pcb.
I soldered that pin with some messy soldering but it worked!!
Here is the finished product.
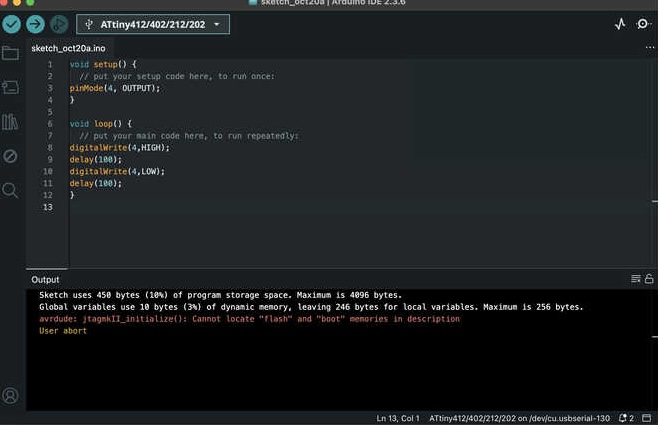
I then programmed the ATTiny412 using the programmer I made to make
the LED blink.
I did get a error message, but after searching it up it wasn't a big deal.
The error was "cannot locate 'flash' and 'boot' memories in description."
My final project idea is still the same.
A robotic arm + lamp